Wednesday, July 17, 2013

Well Done, Spider Suffragette!

via She's History
In the embarrassingly recent movement for women's suffrage, the suffragettes in the UK and US (and
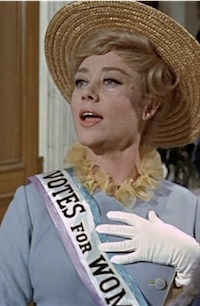
maybe other places?) would wear ribbons and jewelry in the shades of green, white, and violet.  The initials of the colors, GWV, also stood for "Give Women the Vote", with each color representing a virtue: green for hope, white for purity, and violet for dignity.  You could think of the sashes to bring attention to the cause similar to the modern pink ribbons for breast cancer.*  Probably the best example of this is pop culture is Mrs Banks from Mary Poppins.  She wears the suffragette ribbon while singing Sister Suffragette.

I stumbled across this information by accident one day and thought it would be fun to make a dress in those colors to represent how far we have come and how far we still have to go.  (As the owner of a set of ovaries, I am very interested in women's rights. ) Of course, I wanted to put on my own spooky spin on it, so I was on the prowl for Halloween fabrics in those colors.  During one of their many sales, fabric.com had spiderweb Happy Haunters (designed by Kelly Mueller for Red Rooster) for super cheap and in the right colors!  (Well, one was beige, but that's close enough).


A note on these pictures: I have no idea why the purple looks so blue in these pictures.  Here is a more accurate representation of the fabric.

The pattern I chose was McCall's 6504, view A.  (For those of you playing along at home, this makes six McCall pattern reviews in a row.)  I felt like the vertical sections showcased the color changes better than anything horizontal would.  If I had wanted that, I could have just made a tiered skirt.  However, I also was slightly concerned that it might make me look like a circus tent.  Only one way to find out.

Fabric.com only sells fabric in half yard increments, and each contrast section of the dress calls for 1 1/8 yards of fabric.  (If there is more contrast than main fabric, would each contrast section be the main fabric?)  I went with a yard and a half each of the contrast.  I figured that I would greatly increase the hem and that would use up the majority of the fabric.  Yeah, I didn't read the cutting layout before I ordered the fabric, so I shot myself in the foot.
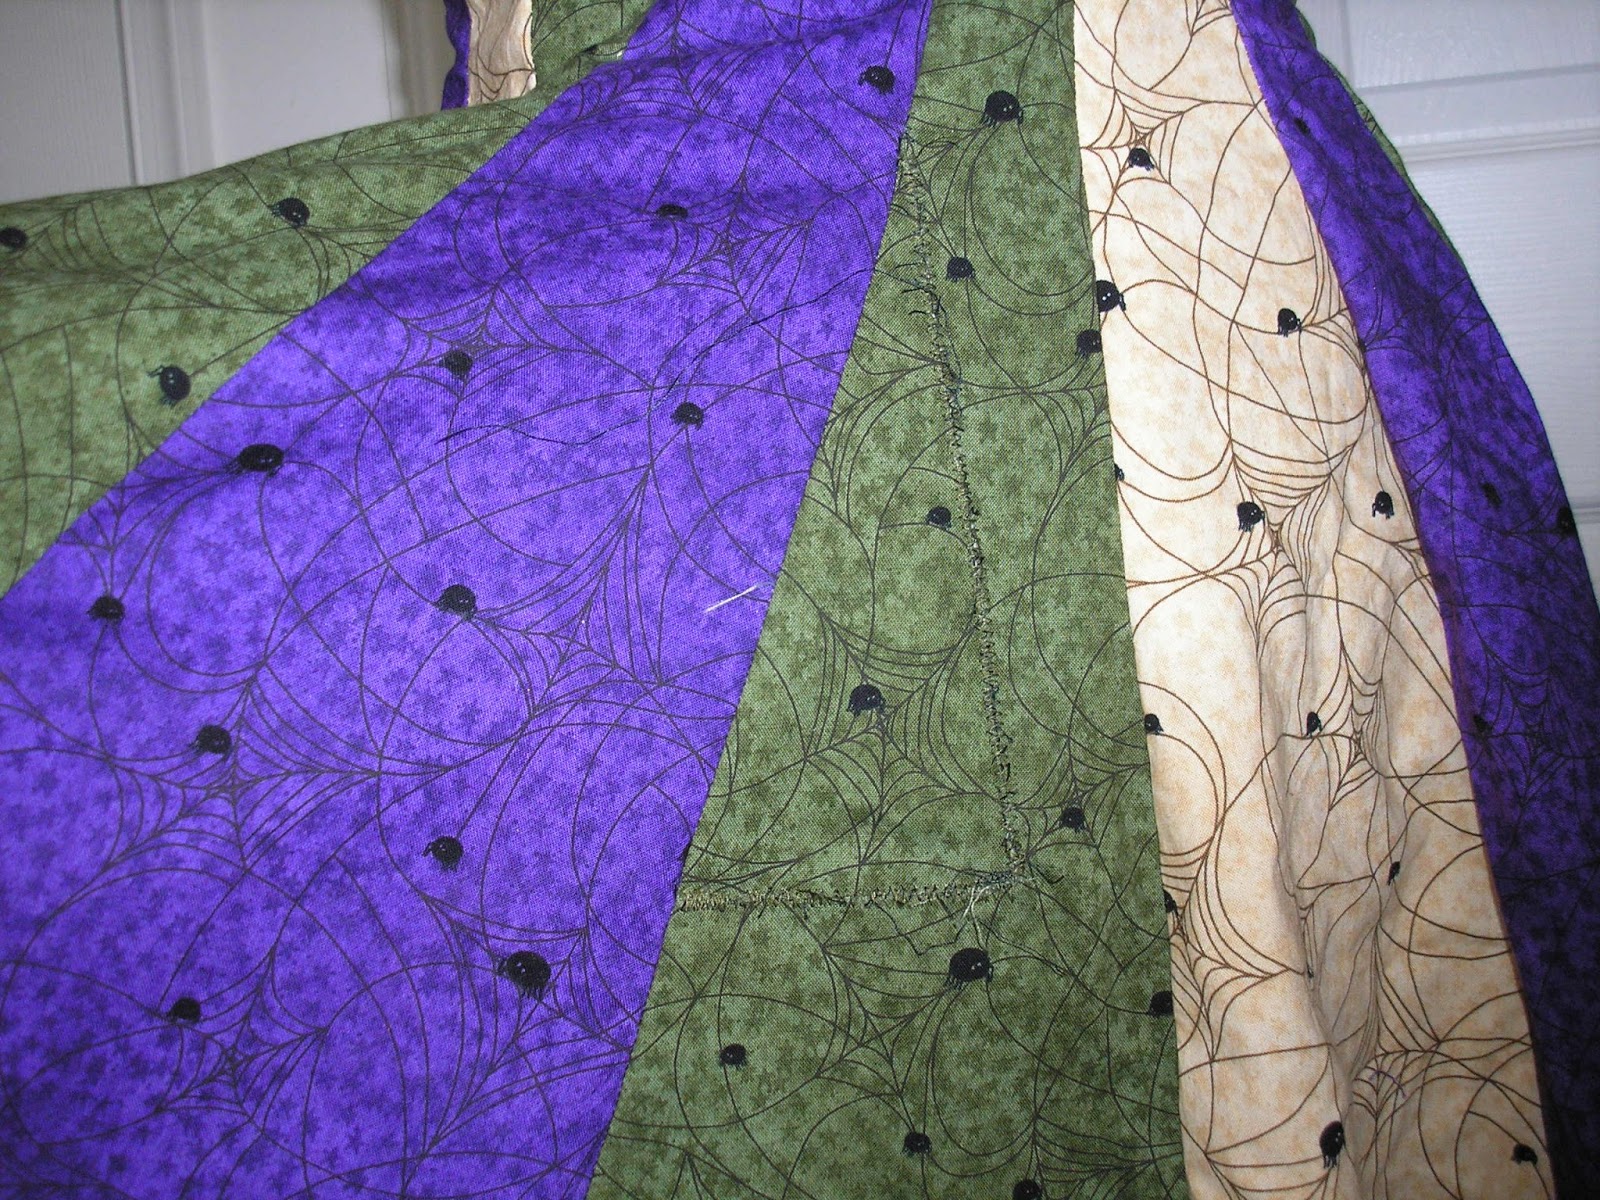
The patch is in the middle of the green piece
It doesn't say so anywhere on the envelope that this pattern assumes you've got bi-directional fabric, so that vastly economizes the layout.  Of course, mine wasn't.  I discarded plan after plan until I finally realized I was going to either need to order more fabric or I was going to end up with a nasty patch on one of the panels.  I am quite impatient, so I went with the patch route.  I might end it trying to cover it with a spider applique or something.

I had planned to use up the extra fabric by increasing the length by six inches, but that was before cutting layout disaster struck.  The best I could do was two inches.  Better than nothing.

This also meant my back section would be made out of two different fabrics.  (This is what the original pattern called for.)  I HATE it.  It is awful.  But I didn't have any choice.  I guess it doesn't look as bad as I thought it would, but it greatly bothers me.

On top of all of this, I lost the front facing piece.  I tore the house apart looking for it, but it was nowhere to be found.  I traced the sewn together front of the dress to make my own facing pattern.  I used the beige fabric to minimize show-through.  I didn't interface them, because my life has fallen apart and caring about interfacing is too hard for me right now.

I didn't read the directions for attaching the facing, so I messed up the armholes.  After the fact, I realized I probably could have flipped the seam allowance between the dress and the bodice, and then machine-stitched or hand-stitched the armhole shut.  Instead, I flipped it to the inside of the facing and hand-sewed it.

The problems with this dress are my own fault.  I had such high hopes for this, but I am not sure I like it, and I still thinks it looks a bit like a circus tent.

*: The mastermind behind This is Corp Goth and Trystan's Costume Closet, the fabulous Trystan Bass, has been diagnosed with breast cancer.  If you can spare the funds, please consider making a donation to help her out.

UPDATE: Here's the song Sister Suffragette.

Wednesday, July 3, 2013

Skeletons in the Closet


My life is a wreck again, so I don't have anything new to show off.  (I am going to try not to go on hiatus, but I make no promises.)  Instead, I am continuing with the McCall's run with another It Came from My Closet entry.  This one is 5050, kinda-sorta view E meets A.  The fabric is a perennial Halloween favorite from JoAnn's.  Who could say no to dancing skeletons?

The pattern is rated as average, but I knocked it out in an afternoon.  I did deviate from the pattern pretty significantly: I skipped the lace cut-outs on the sleeves, replaced the elastic necklace with a drawstring ribbon one, and added a little opening for the ribbon (I used the buttonhole foot).  I opted for the shorter version of the blouse, but in retrospect, I think I would have preferred the longer one.  The lace I used on the cuffs was shorter than what the pattern called for, but I felt too much might distract from the fabric pattern.

The underbust gathering is done with elastic enclosed in bias tape.  I used the scraps to make my own, as I usually do.  The only atypical part of this pattern is that the sleeves themselves are part of the neckline.  It's isn't hard to sew; it just isn't something you see all that often.

Even if you opted for the lace cutouts of view E, this pattern probably shouldn't be rated as average.  Views A and B, which feature gathered cuffs on sleeves would probably also be pretty easy.  D (tiered sleeves) and C (gathered mid-sleeve) look more difficult, but I would still rate this as a beginner-level pattern.

Using the leftover fabric, I also made a bandanna to wear with this.  I'm told it makes me look like a spooky hippie.


Wednesday, June 12, 2013

Grim Grinning Ghosts

Anyone who has followed this blog for any length of time has probably already figured out that I am a GIANT NERD.  (It's kind of a requirement for a software engineer.)  While I definitely have the typical nerdy obsessions (like last week's Ms Pac-Man dress), I also obsess over spooky things as well.  Disney's Haunted Mansion is one of those things.

I had been planning on making myself a skirt featuring the Haunted Mansion wallpaper for a while.  I do have an embroidery machine, but embroidering enough fabric for a skirt was not a something I wanted to do.  My next thought was using a fabric stencil.  I went far enough to cut the stencil out of wax paper, but I lost so much detail in the faces that I just gave up.  I decided I would just embroider a couple of large faces on the fabric and be done with it.  I cut out the fabric for the skirt and it's been sitting in my sewing room for over a year, waiting for me to get around to it.

And then DoomBuggies made an announcement on their Facebook page: Spoonflower had a fabric with the wallpaper design.  It isn't cheap, but I couldn't resist, and bought three yards.  And that meant digging through the pattern collection to find a dress that used approximately three yards of fabric.  The winner was McCall's 6071, a Laura Ashley design, in view B.  (This makes four McCall patterns in a row, the last two of which were Laura Ashley.  This was unintentional, but now makes me wonder how long I can keep this going.)  This view actually calls for 3 1/8 yards of fabric, but considering the feat I pulled off last time, I figured I could do it again.

(Note: if you're even a slight fan of the Haunted Mansion, prepare to lose an afternoon at the DoomBuggies site. And if that still doesn't sate you, head over to Long Forgotten for even more info.)

By not lengthening the skirt, I managed to pull off getting the dress in three yards.  I picked contrasting black bands for the straps and tie.  I did this partially to skimp on the fabric and partially to break up the pattern.

I'm not sure what you'd call this color.  It isn't quite blue, and it isn't quite purple.  I suppose that would make it indigo, right?  But indigo is usually darker than this, so I'm proclaiming that this color will forevermore be called blurpligo.  Blurpligo is a hard color to match.  This thread is periwinkle, and while it is in the same color family, it isn't quite dark enough.  But it was the closest I could find.  (NB: I didn't try all that hard.)  As for the zipper, nothing was close.  It was a choice between this purple and lilac.  In retrospect, black or white probably would have been better.

So, as for the pattern itself, it's fairly straightforward.  The bodice has some gathering, but otherwise there's nothing particularly tricky or uncommon here.  The way the straps are attached makes it easier to lengthen or shorten them as need be.  This does make construction a bit trickier, because you need to leave holes for the straps.  I would say this is good for an advanced beginner.

The tie is sewn on over the gathering.  I think I actually prefer it untied, and if I made this again, I probably would have made it longer.

While I like how the dress turned out, I was a bit disappointed by the fabric.  It's thin and a bit scratchy. When I washed it, the blurpligo faded a bit unevenly.  I would have to really be in love with a fabric to buy from them again.


Sunday, June 2, 2013

The Leader of the Pac


Welcome, Red & Black Week readers!

via fabric.com
The Pac-Man fabric returns!  You may recall this was originally going to be Butterick 4790 (instead, I used a dot fabric and it became the disastrous Skittles dress).  I briefly considered making McCall's 6024 in this fabric, and even went so far as to cut out the pattern, which I promptly refolded and stuck back in the envelope.  The fabric has been sitting, folded and forlorn, in my stash, just waiting...   Watching...  Judging me...

So after more than a year of this, and with Red & Black Week approaching, I figured it was time to get this sewn and stopped being judged by a non-sentient object.  I started flipping through the pattern stash and came across McCall's 4444, a Laura Ashley halter sundress moondress.  A chose a combination of views B (for the contrast bands) and C (for the length).  View C actually calls for 3 and 3/4 yards of fabric, but I was hoping that since I was using the contrast instead of the main fabric for the bands that I would be able to squeeze the pattern into the smaller amount.  I managed to do it, but it took some creative laying of the pattern pieces and doing something I've never done before: I shortened the dress by an inch.  (Normally I need to lengthen the dress by at least 1.5 inches.)

This back is too low to wear
a regular convertible bra
I guess I am losing my touch because this dress (and the previous one) took me quite a while to make and I struggled with the bands a lot.  McCall's rates this pattern as easy,  yet it took me a week of evenings to finish this.  (By way of contrast, 5050, which is rated as average, I sewed in one weekend afternoon, which included an unexpected voyage to JoAnn's to purchase lace.)  The main body of the dress (essentially, the Pac-Man part) came together quickly.  There are no tricky parts to it, except perhaps the gathering in the bust and the zipper.  The instructions for the bands on the front are poor, so I think I ended up sewing them on inside-out.  You can't really tell except up close, but I know.

Perhaps it is because I am not used to sewing halter straps (my evening gown is the only time that comes immediately to mind), but the construction of these was really odd.  It wasn't really hard, but it was weird.  At least the instructions for this part were clear.  I did make the change of closing the halter with a heavy-duty locking hook-and-eye because I don't trust buttons (what the pattern called for) to the stress of holding a halter shut.  I didn't want to flash my cupcakes at an inopportune moment (or any moment, really).

Other than the changes I already mentioned, the alterations used the contrast fabric for the loop over the gathering, shorten the straps (typical for me), and add the Ms Pac-Man buttons.  (They were custom made for me by Brittany of microwavedtofu on Etsy.)  Because they are made of polymer clay, I didn't want them to go through the washing machine, so I attached them to snaps so I can remove them before laundering.  I still have one left, as well as some of the original fabric, so I will likely make a hair accessory out of it.

So after all the rigmarole I went through for this, I would recommend this one for an intermediate.  Or I am really losing my skillz and this is actually an easy pattern.

To make up for the lost inch, I think I might add some lace trim to the hem.

Wednesday, May 22, 2013

It's a Nice Day for a White Wedding

My brother got married last weekend, and I finished my dress with time to spare (very little time to spare, but still a little). I didn't manage to get any pictures of the full outfit, so you'll have to settle for Azzurra as a model. The dress was McCall's 5269, view A. I originally was going to do view B, but changed my mind for no discernible reason. 

Sorry that the dress looks so wrinkly.  After I wore it, it got crumpled up in the laundry bag on the ride back.

The dress fabric is black glitter satin from the Casa Collection from JoAnn's, which is nearly as heavy as bridal satin.  (You might recall that I used the same fabric in blue for my Jareth coat.)  The pattern calls for crepe, silk, and and taffetta, which are much lighter.  Due to the heaviness, I decided to skip the lining.  Then I read the instructions and decided I needed to at least line the bodice and sleeves.  I chose a plain black cotton because I try to avoid close-fitting synthetics.

I cut out and constructed the dress (except the bottom hem and sleeves) in an afternoon.  Since the lining was made from the same pieces, and I was only lining the bodice and sleeves, it should have taken even less time, right?  Of course not.  I can't fathom why, but it took a whole afternoon just to cut out the lining, another to construct it, and yet another to attach it to the dress.

This dress has less ease than most patterns.  I didn't make a muslin (I so rarely do, and didn't have time for it), but it was stupid of me not to check the finished measurements.  For comparison, the plaid dress I just made, which is of a similar fit, from the same company, and I sewed in the same size, had an extra inch of ease in the bust.  Though the hip measurement was the same, the plaid dress had sections cut on the bias in the hips, so it stretched a little.

So anyway, this dress was quite tight.  (It also didn't help that I ate a whole pizza for lunch the day of the wedding.  I jokingly said to Mr Husband that my dress wouldn't fit after that, and then it almost didn't.)  It wasn't uncomfortably tight, except in the shoulders and arms.  I quite muscular, and it worked against me here.  I couldn't really raise my arms much above my waist.  If I had had the foresight to check the ease, I probably would have gone up a size.

Also, be wary if you have any chest at all or are self-conscious about decolletage.  This dress is a bit low-cut, and tight enough to push everything up and out.  Even I had cleavage.

Now, as for the difficulty, I am going to attribute the inexplicably lengthy construction to me freaking out over the deadline.  I imagine that if I didn't have a deadline, I could have knocked it off in a weekend.  While the yoke lines up to the dress oddly and that took a bit of fiddling, the main body of the dress was pretty easy.  It's just princess lines, so it's a matter of snipping your seams appropriately.  The pleats in the sleeves were a bit tricky, especially because satin is slippery.  It wasn't really hard, but it was time-consuming to get it just right.  In fact, it was so time-consuming that I ended up nixing lining the sleeves and hand-sewed the hem up.  (So for those of you playing along at home, I went from not lining, to bodice and sleeve lining, to just bodice lining.)  So I'm going to rate this as an average-level pattern.  If someone who hasn't attained that level wants to tackle this, I would suggest using a non-slippery cotton.

The wrap was just glitter organza (also from the Casa Collection) that I sewed together with French seams.  Since brooches have a tendency to damage fabrics, I attached two ribbon loops to feed the brooch through.  I just happened two have two tiny pieces of ribbon in my stash that were just long enough (why I had them, I don't know; normally I would have tossed such tiny pieces).  If I hadn't had those pieces already cut, I probably would have used a narrower ribbon.   It worked out okay with the brooch I chose, but it had a pretty long back.


If you choose to use this glitter organza, beware that it sheds its sparkles LIKE CRAZY.


Wednesday, May 8, 2013

It's Not Easy Being Green

As Granny Weatherwax would say, "I ATEN'T DEAD".  I'm slowly finishing up my laundry list of stuff that needs to be done, and hopefully I will have some free time around the beginning of June.  (Or maybe not - one friend has invited me to go camping and another has organized a picnic.  I've never had such a full social calendar.)

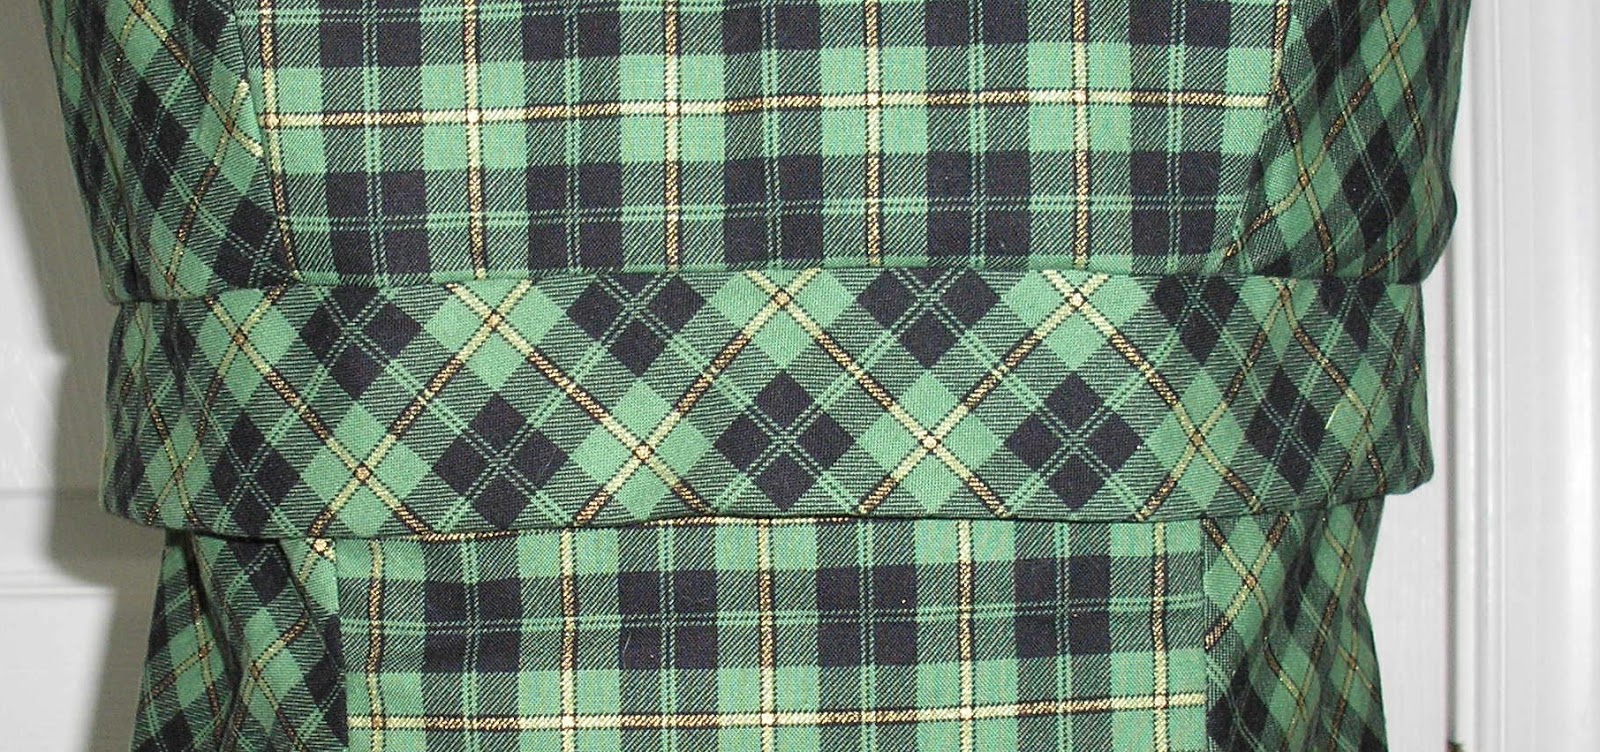
Anyway, onto to pattern.  This is McCall's 5923, view A, which is long out of print.  It's an empire-waist dress, partially-bias cut, with princess seams and a back slit.  View A has a front band.

The fabric is, of course, from fabric.com and is called Top o' the Morning by Allover Fabrics.  It's green and black plaid, with gold accents.  I acquired it during my last green and black binge.  It's heavier than most fabric of this sort, which was surprising to me.  It actually worked out well for this pattern, since the bias-cut pieces tend to stretch.  A lighter fabric could have been distorted.

The pattern has different cup sizes: A - B, C, and D.  I was a bit concerned about this, because I am actually a AA. I did some research, and it seems like the Big Four (at least) use a B cup as the standard size and that works out for me all right.  I think my broad back offsets the small cup and they end up evening each other out.

The cup sizes differ in the two front bodice pieces.  Though the pattern pieces aren't flat, you can can sort of see the difference between the D cup (top) and the A/B cup (bottom).

So I didn't alter the pattern for the cup size; I did the usual changes to lengthen the skirt and shorten the straps.

As for the difficulty, it's princess seams with no darts, so that greatly simplifies things.  The bodice is lined, and needs to be tacked down by hand because the bottom doesn't line up nicely, but that's pretty easy.  The weird fabric yoga you have to do for the straps so the seams don't show is weird, but that's the nature of the beast for anything of this sort.  So this would probably be good for an advanced beginner.


 And finally, let's go out with Kermit:


Wednesday, April 17, 2013

Right off the Bat

I am not known for doing subtle well (I am sure that it comes as a shock that the person with purple hair does not do subtle well), so when Trystan announced this month's theme was hidden bats, I was at a bit of a loss.  Most of the batty things I make are over the top.  So I'll just call it hidden by my standards, as I didn't add batty earrings, barrettes, hosiery, etc.

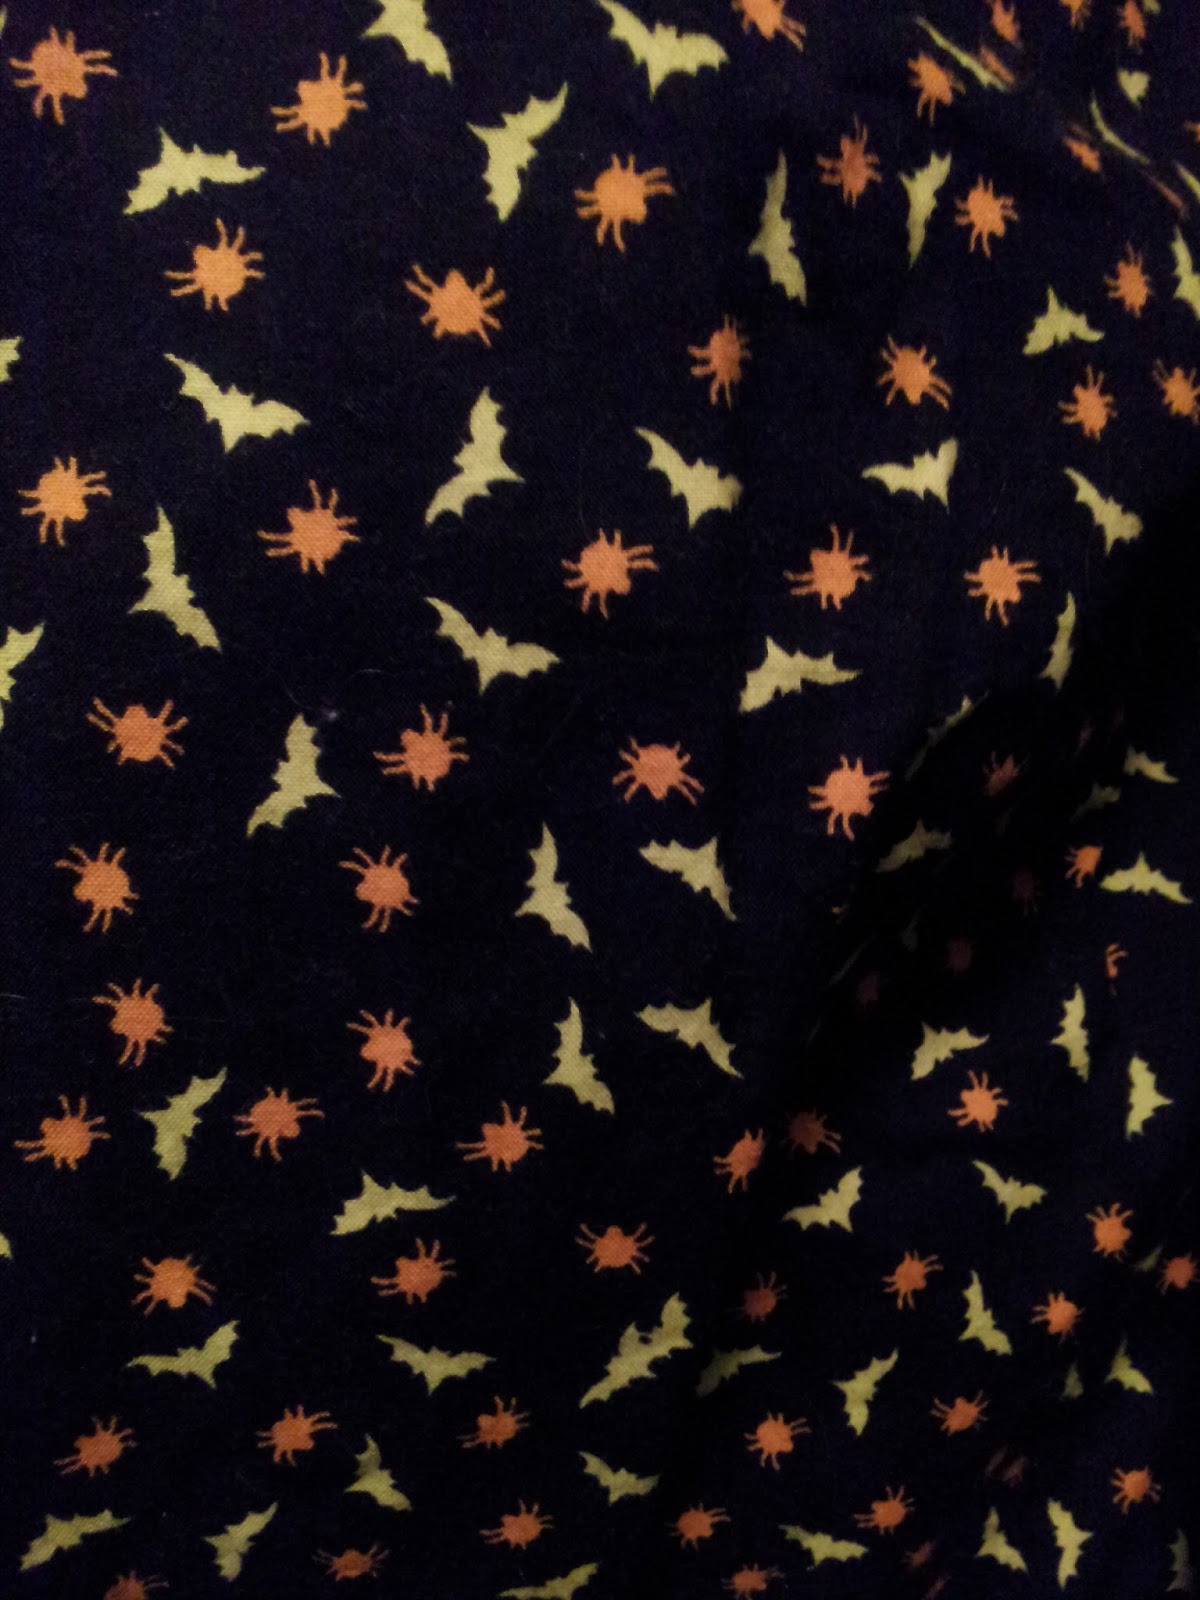
I was at a particularly low point in my life when I made this blouse.  I felt like everything I did was wrong, work was terrible, my husband's grandmother had just passed away, and a dear friend disappeared off the face of the earth.  In an attempt to make myself feel better, I thought that perhaps if I tackled a sewing project, I might have more confidence.  I already had New Look 6179 in the pattern stash, and it looked easy enough.  I selected view A and grabbed this bat and spider fabric from the fabric stash.

(The story behind this fabric: I went into JoAnn's after Halloween and this fabric was 75% off.  I didn't have any particular plans for it, so I thought two yards would do.  There was something like two yards and four inches left on the bolt.  Rather than just have that four inches thrown away, I told the clerk I would take the whole piece.  She seemed to think I was just asking her to give it to me, though I most certainly was not.  It took considerable effort to make her understand otherwise.  Because those extra inches were considered a remnant, which is 50% off, and the fabric was already 75% off, those four inches she was thinking I wanted for free cost me a grand total of... EIGHT CENTS.)


Back to the review.  I didn't read the instructions before I selected the pattern.  If I had done so, I might have selected a different pattern.  Though cotton is the first suggested fabric, this pattern is designed for sheer fabrics; thus, French seams are used.  At that point, I made never tried to sew them, and considering how bad I felt about myself at the time, failure at this would have devastated me.

I am too stubborn determined to admit defeat, so I plunged ahead anyway.  I learned that French seams aren't so bad, but it is certainly weird to put right side to right side for sewing them.  Even now, I do have to double-check myself to make sure I've got it right.

This is a basic, loose-fitting blouse, so there aren't too many issues with fitting.  There is a slit down the front that is faced that I couldn't quite get to lie flat (enlarge the last picture).  The damn thing kept flipping outwards as well, so I tacked it down with some hand-stitching.  The upper seam is enclosed in  bias tape (I made my own from the fabric), and I threaded the ribbon through that.

Even after all my whining about the blouse, it wasn't too bad.  Once I got over my fear of French seams and my general malaise with life, this blouse came together rather swiftly.  Someone not wallowing in the depths of depression could do this blouse with beginner skills.

As for this other shirt, I think I got it from Target in their Halloween clearance.  It features an intentionally distressed bronze heart with bats fluttering away from it.

I just happened to wear this on a day when I was getting some bloodwork done.  The phlebotomist was surly to me from the moment she walked into the room, even though I was entirely polite and respectful to her.  After she drew the blood, she explained her rudeness was due to her being afraid of bats flying into her hair.  Apparently the cartoony bats from my shirt were going to come to life and attack her?  Bizarre.

UPDATE: Here is a close-up of the bat and spider fabric.