Showing posts with label food and drink. Show all posts

Friday, June 8, 2012

Watermelon Dress

Welcome to my final post for Sophisique Noir's Red & Black week.  Today's post is New Look 6900, view A.  The fabric here came from Fabric.com, of course.  I acquired it on my last fabric binge.  The name is Metro Market Watermelon Slices.  Okay, okay, so it's red and black and pink - pink is pastel red!  It counts!

Regular readers know of my love-hate relationship with pockets in dresses (tl;dr: I love having pockets, but hate that they bulge and look like crap).  This pattern's pockets are external, so I decided to take the plunge and include them for once.

You'll also notice a ruffle on the pocket.  The pattern did not call for this; I had a sudden urge to use up some of the pink fabric in my stash.  (It came from the much-mentioned Daisy-Head Mayzie costume.)


The facing details for both the pocket and the bodice (to the right) are attached in an atypical matter; you can see here that the right side of the facing is facing the wrong side of the bodice.  Because it is such an unusual method, I had to reread the instructions several times to ensure I was doing the right thing.  After these are sewn together, the facing is flipped over to the other side.


I learned my lesson from the coffee dress: do not straight stitch on elastic, even if the pattern calls for it!  You can see that I made a casing here and threaded the elastic through, catching it at the ends. 

I added a ruffle to the bottom too, using the same fabric.  Unlike yesterday, when I stole pieces from another pattern, here I just cut a piece that was twice as long as the edge of the skirt, gathered it, and sewed it on.

The dress is cute, but I fear it looks a bit like an apron, and would even more so if I hadn't extended the length by three inches.


I wanted to add another ruffle to the straps as well.  I cut and gathered the fabric, and was about to pin it on when I changed my mind.  I'm not sure why I 180ed.  Maybe I didn't want it to look too much like the cherry dress?  Anyone out there with any thoughts on adding ruffles to the straps?

Thanks for reading my R & B week posts.  Looking forward to seeing you again next year!

Thursday, June 7, 2012

Ch-ch-ch-ch-cherry Bomb

We're in the home stretch of Sophisitque Noir's Red & Black week, and I have a final blast from the past for you (today's) and a new outfit (tomorrow).  I apologize for the quality of pictures for today and tomorrow: the batteries in the camera were dying and I had to take them as quickly as possible.

The pattern here is McCall's 5094 in view F; if that sounds familiar to you, it might be because I used the straps from this in the Space Invaders dress.


I believe that I made this last spring, and I wanted to make it out of just one fabric (view D, basically).  However, when I went shopping for fabric, nothing really struck my fancy.  (Must have been before JoAnn's releases their Halloween fabrics for the year. :D)  This cherry and dot print I finally picked was cute, but I thought an entire dress would have been overwhelming. I couldn't resist its cute rockabilly/gothabilly charm though, so I went with view F.


Though a dress entirely out of that print would have been too much, I thought just the band and straps weren't enough, hence the ruffles in the polka dots.  They came from Simplicity 2325, an Alice in Wonderland costume that I adapted into Daisy-Head Mayzie for a friend of mine.


As for the pattern itself, it wasn't too bad at all.  I would recommend this for an advanced beginner.  The technical challenges were:
  • inserting a zipper
  • a lining
  • a bit of gathering under the bust
  • a lot of gathering if you go my route and add ruffles
I wish I could have taken pictures of the full outfit, but the husband wasn't at home and my self-photography skills are quite lacking.  The pictures don't show how fun this dress really is.  I get a lot of flattering comments whenever I wear it, which I inevitably follow with "...and it's fun for twirling!" and then promptly spin around in a few circles.  And then I get some weird looks (which, to be honest, is not a rare occurrence for me).


And for good measure (not the original, sorry):


Tuesday, June 5, 2012

Revenge of the Coffee Dress

Regulars readers may recall when I sewed the coffee dress, I was disappointed in the sleeves, and was only intensified when I wore it to work one day.  Basically, they are supposed to neatly hug the sides of the shoulders; instead, even hiked onto the top of my shoulders, the slightest movement sent them cascading down my arms.  I knew it wasn't going to work when I was sewing it, but I followed the pattern anyway.  This is what I get for following the directions exactly for once.
The proper way to fix this would have been to rip out: the hand-stitching on the lining on the bodice, the understitching at the top, the stitching at the top between the bodice and its lining, the sleeves from the bodice, and then the sleeves themselves.  Then fix the sleeves and redo all of the stitching that I had just ripped out.  That would have been the right way to fix it; instead, I ripped out the stitching at the top of the sleeve. 
I then ripped out the elastic.  I should have known better than following the pattern's instructions to use a straight stitch on elastic!
Before I started ripping the dress apart, I measured the slack in the sleeve: a whopping 2.5 inches!  Utterly ridiculous.  And I'm pretty broad-shouldered, so it isn't as if this doesn't fit because I am particularly petite or something.  Anyway, not wanted the sleeves to be too tight, I took off 1.5 inches.
I prefer to use a casing or a zig-zag stitch on elastic.  I went with the casing here because I thought I could hide it a little better.  I just folded the top of the sleeve down (along where the original stitching line) and then sewed it close to the edge.  It's a good thing I didn't trim the seam allowance here (and I remember thinking at the time that it was odd that the pattern didn't call for that).
The original elastic length was nearly as long as the sleeve (another reason their darn instructions wouldn't have worked).  Since I took 1.5 inches off the sleeve, I took off 2.5 inches from the elastic.  I inserted it into the casing and then top-stitched the sleeves shut.  Much fast than ripping out almost everything.
I apologize for the blurriness here; I had to turn off the flash so it wouldn't reflect in the mirror.  The sleeves still aren't perfect, but they're much better.  I wore this to a bridal shower and a bunch of people told me I looked fabulous!

Thursday, April 5, 2012

Coffee Dress: Full Outfit

The fabulous Trystan of This Is CorpGoth suggested I accessorize my 
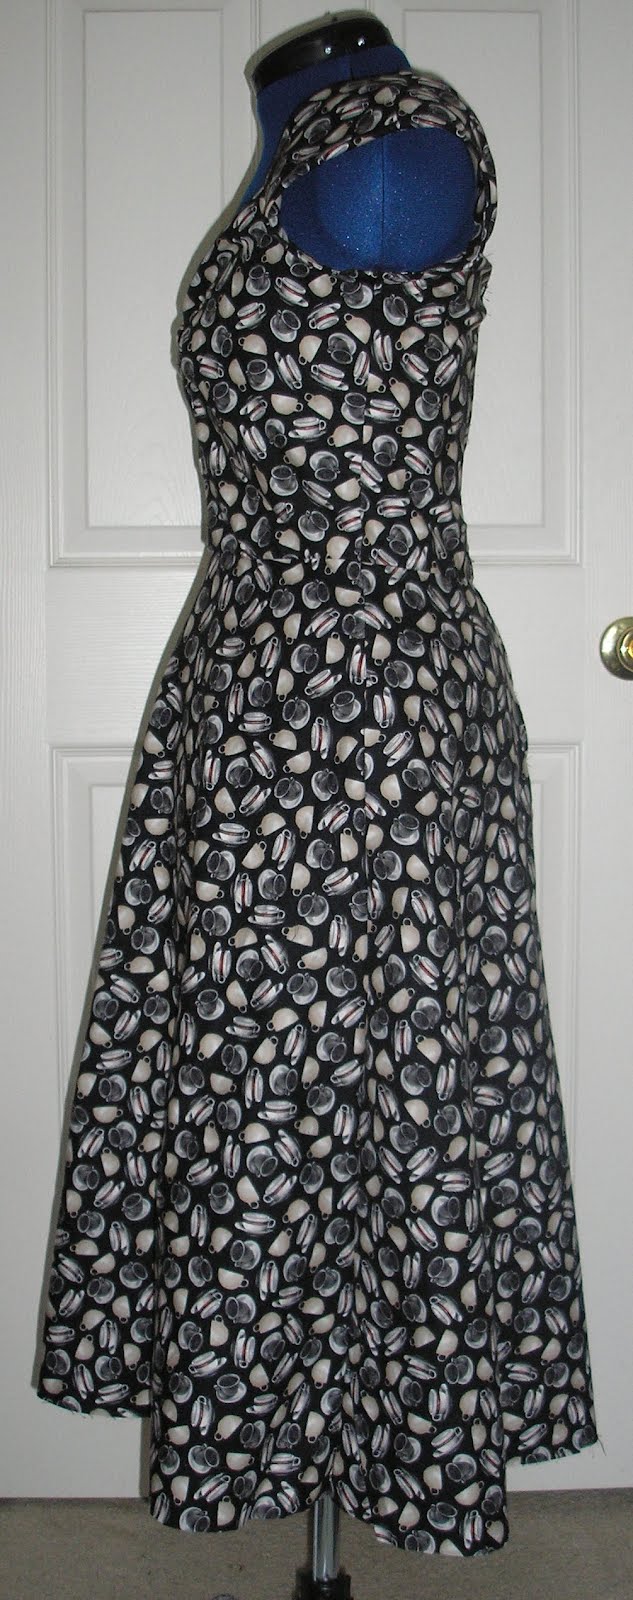
coffee dress with red. I rummaged through my closets and jewelry box, digging out things I forgot I had or hadn't worn in a while. Here's the full outfit:


Since the dress is somewhat vintage in style, I wanted to use accessories with the same flair. This hat certainly fits the bill. Whenever I wear it (which is usually to funerals, since this is really too fancy to wear elsewhere), I get loads of compliments. These pictures don't do this hat justice. It's truly elegant and makes me feel like a million bucks (at a funeral - oh how morbid!). It was custom made for me on Etsy by My Treehouse Studio.


The gloves were purchased from Target's Halloween 2011 clearance. Being the cliche that I am, I also bought two pairs of stripe-y tights at the same time (fuchsia/black and orange/black). While I wear the tights frequently and they have held up well in the months since, the same cannot be said for these gloves. The bottom seam fell out and the edge isn't finished, so it started fraying. Unfortunately, I had to take them off shortly after I got to work. It's an easy enough fix, but it's annoying and once again demonstrates the value of hand-crafted items. Wrist-length gloves probably would have been more appropriate here, but I don't have any. YET.

The earrings I've had for forever. I probably got them at Claire's as a tween. While digging through my jewelry, I discovered I have far less red than I though I did most of the vintage stuff is just too fancy. (You know what that means, right? To Etsy to purchase things I don't need!) I went for hoop earrings here, as that's pretty neutral as far as my earrings go.


The fishnets are from We Love Colors. If you haven't shopped there before, you should definitely check them out - 51 colors to chose from in tights, fishnets, thigh highs, etc! They also things like carry dancewear and gloves. And don't feel left out, guys and kiddos, they've got stuff for you too. I know some people - including myself - have had some issues with their sizing, but their wares aren't so expensive that one pair of ill-fitting tights is the end of the world.

I did almost go with solid red tights, but for one, it's just too warm for that here, and two, I thought it might be too much here. The fishnets do have a vintage flair to them that regular opaque tights don't have (IMHO).

While they're a little bit tough to spot, you can see that I'm wearing red barrettes here. These came from Etsy seller Nattie's Place (who seems to have closed up shop). I likely bought them in a lot of 10 or 20.


The shoes are from Famous Footwear and feature wingtip styling.

My hair is about shoulder length (this is after growing it out for a year - it was about nose length before), so there isn't a lot I can with it (not to mention my lack of talent and experience here). While it's difficult to see, I pulled my hair back into a ponytail and then flipped it under and wrapped that in the hair elastic. It looks somewhat like a bun, which my hair isn't long enough for. If there's a name for this style, I don't know about it. Also difficult to tell from this picture (partially because of the lighting and partially because my hair was wet), my hair is actually purple in the front and brown in the back.

As I mentioned previously, I did have issues with the sleeves of this dress. I did not like how they turned out and they won't stay where they were supposed to. I had to yank them all the way up to my shoulders, which is not how the dress is meant to be worn. While it looks okay that way, the slightest movement sends the sleeves cascading down my arms. I am definitely going to have to do something about it, which means ripping apart the dress I just finished. Harumph.

I apologize for my bra straps showing. I didn't realize that until it was too late. A strapless bra would probably be the way to go with this dress (especially if the sleeves actually would sit where they are supposed to). Lesson learned.

Cost breakdown:
Shoes: under $50 from Famous Footwear
Gloves: under $10 from Target
Fishnets: $9 from We Love Colors
Barrettes: ~$2 from Etsy seller Nattie's Place
Hat: $55 from Etsy seller My Treehouse Studio
Dress: ~2.5 yds of Lucy's Crowd Coffee Cups @ $7.21/yd (but I had $20 coupon!) from Fabric.com

Thanks to my dear husband for taking the pictures.

Monday, April 2, 2012

Coffee Dress

I mentioned this pattern previously. I made view A, 'cause I loved the sleeves.

I was going to go with a Halloween print, but ended up picking a coffee print instead. Think it'll look perky? Ha ha ha! Ha! Anyway, I found out after the fact that this is actually an I Love Lucy print. That doesn't really matter, but I thought I'd mention it.


Most of the construction of this dress is pretty straightforward, except the sleeves. There's some gathering in the bust, but that's nothing too big. Here's the bodice:


Rather than go over every little detail of the sewing and then showing the final product, I'm going to show the final product and then go back to the details. This was another dress where it needs to hang (overnight, not 24 hours!) to stretch before it's hemmed. I was impatient, so I went ahead and took pictures of the unhemmed dress.


Here's a close up of the gathering:


NB: those sleeves don't really look anything like the pattern envelope. I could tell as I was sewing them that they weren't going to work; the elastic was just too long and inserted in a stupid way. They're supposed to hang off the sides, but the only way the dress will stay up is if I pull them all the way up like I've done here. I'm not sure if I'm going to keep it that way or try to fix it yet, but I was pretty disappointed by how this turned out.

I will probably go back and make the bolero featured in this pattern at some later date. If I do anything to the sleeves, I will do a post on that also.

Other than the sleeves, this is a pretty easy pattern. The gathering aside (which isn't even in all the views), the only other challenges would be inserting the zipper and the understitching. While I haven't tried the other views, I would say going with either the straps or the sleeves of view C would be the way to go here. A beginner could probably handle this pattern.