
Showing posts with label halloween. Show all posts
Showing posts with label halloween. Show all posts
Tuesday, January 8, 2013
Happy Birthday, Jareth!
The Goblin King turns 66 today. Happy birthday, David Bowie, and thanks for the inspiration for my Halloween costume.

Thursday, October 18, 2012
Daisy-Head and Confused
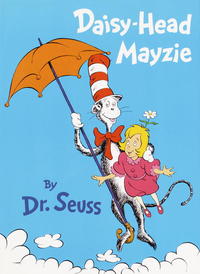 |
| via Wikipedia |
A friend of mine asked me to make the costume for her. It was a last minute thing and we didn't have any time to ensure a good fit. The shoulders ended up being too wide for my liking, and the torso too long, but considering the rush, I was pretty happy with the fit, and so was she (and she was the one who had to wear it, so that's what matters).
The pattern I picked Simplicity 2325 (view B). I went with cotton for cost reasons and because it was supposed to be worn to an outdoor event in August. While it looks like I changed the pattern a lot, most of it is pretty superficial. IIRC, the bodice has separate pieces for the pinafore and the dress, so I simply omitted the pinafore pieces. The skirt is actually all pinafore, so I just made that in the dress fabric, leaving the ruffle off.
The collar and sleeve scalloped edges probably caused the most problem because I had trouble getting them to lay flat. I made several patterns and muslins before I got one that worked.
This pattern took more time than you would think that it would. Due to the bulk of the skirt and the gathering involved, sewing it to the bodice was cumbersome and time-consuming. It wasn't hard, per se, but I certainly wouldn't recommend this pattern if you want something you can knock off in an afternoon. The difficulty her would probably be for an advanced beginner.

The contest rules go up tomorrow and the contest starts October 24. I hope you'll be participating!
Monday, October 15, 2012
Poe-Pourri


  | This week's post is my costume from two years ago: Edgar Allan Poe. I know, I am a cliche. It is difficult to find modern female sewing patterns that emulate the look of late-Georgian and early-Victorian men's clothing. I had considered buying men's patterns and adapting them to fit me, but that seemed like too much work. Another option was sewing men's patterns and padding or binding my curves which applicable. In the end, I decided that it would be better to use women's patterns: if any of the pieces turned out well, I could use them in my daily wardrobe, I could see the idiots I worked with at the time making inappropriate comments about my body if I disguised my figure, and I had never tried to turn a male pattern into a female (and it was not the time to experiment). While I was searching for patterns that would work for this costume, I happened across Butterick 4815, a double-breasted vest. I sewed this in a beautiful brocade of black, gold, green, purple, and magenta. The pattern featured birds of paradise and other Asian-inspired designs. I wish I had bought more of this brocade because it is utterly stunning. The vest itself isn't too different from any other vest pattern. The changes I made to this pattern were raising the front a little so there was an extra row of buttons (their vests came up higher back in those days) and put actual welt pockets in (which meant I could wear my pocket watch). While questing for patterns, I hit dead end after dead end with the big four. This caused me to resort to more obscure pattern companies for the rest of my costume. Most of these actual ended up being reproductions of authentic late-Georgian or early-Victorian era patterns. The next item I made was the coat. I wasn't too pleased with this. I think it makes me look bulky. Some of that was probably the fabric selection (taffeta), and some of it was probably that I was wearing it over a vest and blouse. The pattern here is Buckaroo Bobbins Outing Jacket. But the pattern has such potential that I think I would like to try this again as a non-costume garment in a different fabric. The sewing of this one was a little tough because some of the lines were mismarked. Additionally, because there are so many variations on this pattern in one envelope, it made following the directions a bit tricky. IIRC, the only change I made here was to lessen the poofiness of the sleeves. I would recommend this for an intermediate, and I bet it would be a great addition to a steampunk costume. May I also state that I spent hours sewing on this gold trim by hand. The blouse is Laughing Moon 103, view A. This is meant to be worn with a corset; given that I was cross-dressing, I did not wear one. The fit was still pretty good, even without the corset, but it was a little tight around the neck. I expected it to come down further than it did (it ended at the waist), so it was fortunate that the vest covered this up. I won't be wearing this blouse again for that reason. This is another pattern i would recommend for an intermediate. It does have boning (which I omitted because I don't need the support), so bear that it mind if you want to sew this. The pattern I bought for the pants, and fully intended to use, was Laughing Moon 106. I ran out of time and never got to the pants. What I am wearing is my tuxedo pants from Burda 7986. (I will post pictures of the tuxedo at some point in the future.) The reason I ran out of time to make the pants is because I was busy making myself the hat band (not featured) and tie at the last minute. I had commissioned someone to make those for me, as well as gloves, on Etsy, and they flaked. This led me to staying up until midnight the night before, and getting up at 4 AM the day of, to finish these last minute items. The raven is from Etsy, and so are the tie pin and earrings. The boots are Vegetarian Leather combat boots. This bottle of absinthe I gave to my husband as a birthday present. It should surprise no one that I already owned the Poe tome and the top hat. |


Monday, October 8, 2012
Catfishing for Compliments
 
| Readers have likely surmised that I enjoy a good pun (and bad ones as well). I had it in the back of my head for a while to dress Theora as a catfish for Halloween. I found the idea utterly hilarious, though I knew she would hate it. Last year, I found the time to finally get around to the costume. The pattern here is Simplicity 3667. I used D, the dinosaur, but omitted the legs, cuffs, and spikes. I added fins and a sad looking tail (you can see it flopped to the side in the bottom picture). Theora is Siamese, which tend to be a smaller breed, so I used the smallest dog size (based on the spine measurement). I had to cut the leg holes bigger, but it was a pretty good fit. This was an easy costume; I knocked it out in an afternoon. The tiny little legs openings might present a bit of a challenge, but it's no more difficult than baby clothes. |
Saturday, September 29, 2012
Letting the Cat out of the Bag
  
| Today's Halloween costume is from seven years ago. I apologize for these photographs, as I took them myself with the timer, and my crappy grad school apartment isn't exactly the right sort of backdrop for this costume. Anyway, this year I was the Michelle Pfeiffer Catwoman. (The previous year, I had been the Lee Meriwether Catwoman.) In the movie, her costume was made out of PVC, leather, and latex. It also featured a corset. Latex was out for me (allergies), leather was out (vegetarian), and I didn't have the skills at the time to attempt a corset (seven years later, I still haven't tried). So it was a PVC jumpsuit for me. Like the Harley Quinn costume, I did not use a pattern. While it worked for Harley, that was not the case here. I did not have enough experience to work without a pattern, and this ended up chafing my armpits all night and being too loose in the waist. To create the bottom half of this, I held the fabric at hip level and pinned it together along the crotch and butt. From there, I tapered he legs and sewed hem together. Not the best way to make pants, even with a stretchy fabric. My bottom-heaviness makes pants difficult. From there, I did the top piece in four parts, with a zipper in the front middle. The zipper was under a lot of stress due to the poor fit, so I had to replace it once and very nearly a second time, but the second zipper valiantly persevered though the night. The headpiece was quite difficult. I think this was my fourth attempt at it. If this one hadn't worked, I probably would have just given up. The key here was to add a middle piece, which you can probably see most clearly in the second picture. To get the ears to stand up (which should have been a bit larger), I used electrical cable ties which I cut into pieces several inches long. I hand stitched the ears on. Onto the stitching. I wasn't going to attempt to replicate the stitching in the movie costume, so I just haphazardly did a narrow zigzag all over the place. If I had more foresight, I would have did the stitching before sewing the seams. It was quite arduous attempting to get the machine into little nooks and crannies. This is why there isn't much stitching on the sleeves. I am my own worst critic, I know, but it embarrasses me to look back upon this, seven years later, and see the vast improvements that could be made. I did learn from my mistakes here, and hopefully others can benefit from my experience. I did receive a lot of praise for this costume, but the best thing to come out of the party that I went to is that my now husband proposed to me that night. :) Remember, I'm running a Guess My Costume contest to celebrate Halloween. I think it will start October 23 and feature seven days worth of hints, with the grand reveal coming on Halloween itself. I will be posting rules as we get closer to the start. Would readers like the prizes revealed before or after? |
 |  | 
|
Tuesday, September 4, 2012
Someone Special II
Last time, my entry for the Sophistique Noir September theme of Someone Special featured the lion costume I made for my husband. Victorian Kitty herself requested more pictures, and who am I to turn down such a request?
Completely on a different subject, has anyone else in blogland been having issues with captcha on Blogger?
 |
The husband wasn't home for this, so I used Azzurra for the model. He wears a larger size than me (he's three inches taller and quite a bit broader), so though this costume is too big for Azzurra, you can still see how a female figure could get lost in it. Conversely, if you were really busty or hippy, then that could also present a problem with the fit. |  |
 | The tail is stuffed with poly-fill. It was supposed to have an odd bit of fur on the end, which I didn't like. Instead, I used the fabric from the tummy portion and made a couple layers of fringe with it. Hubby liked to sneak up behind me and whack me with it. As I was attempting to take pictures, I accidentally set it swinging, which Lydia took as an invitation to start batting at it. Sadly, I didn't get any good action shots of that. |
 | Here we see one of the spats, a glove, and the headpiece. The gloves were super simple - just two pieces sewn together and then hemmed. The spats were a bit more complicated, as they involved elastic, but weren't too complicated. The headpiece, as I mentioned before is just elastic encased in fleece. The ears were actually a bit finicky to make because the pieces were so small. |
Completely on a different subject, has anyone else in blogland been having issues with captcha on Blogger?
Saturday, September 1, 2012
Someone Special
The Sophistique Noir theme for September (how is it possible that it is September already?!) is Someone Special. Cliché as it is, I chose my hubby. And with Halloween fast approaching, what better item to feature than a costume I made him a few years ago?
As for the sewing itself, I think I knocked the main body of this off in the evening and finished the gloves, spats, and ears the next night. Though tackling heavier fabrics (especially fur, ugh) can be a challenge, I think an amateur could tackle this costume. The really tricky part was aligning the front belly part (because it needed to be symmetrical).
I will be posting more past Halloween costumes this season, with the big reveal of this year's coming on Halloween itself. Stick around for the pumpkiny goodness!

  | The husband has ridiculously curly hair. At one point, he decided he wanted to grow it out. For a long time, it just got bigger instead of longer. As Halloween approached that year, I was trying to think up costumes for us. I had already decided to be a privateer (and was leaning towards the same for him), when he came downstairs one morning with a serious case of bedhead. The leonine nature of his coiffure lead to me announcing he was going to be a lion that year. He just yawned and asked if there was any coffee, which I took as consent. The pattern in question here is Simplicity 2853 (which includes a gorilla, bear, and cat in addition to the lion; if you want to make a leonine, simian, ursine, or feline family, the children's version is 2855). The costume is unisex, but is based on chest and hip measurements. It isn't abundantly fitted, but I think a particularly hourglassy lady might have some trouble with the fit. I did not make the hood for the lion costume (since hubby had a mane already) and just made the ears. I measured his head and cut a piece of elastic accordingly, which I covered with the same fabric as the costume. The ears were hand-sewn onto that. I imagine attaching the ears to barrettes or clips would also work well. You could probably could use a plain old headband too. The suggested fabrics listed here are fur, long-haired fur, fleece, faux leather, sherpa, and suede. I used basic polar fleece. The party I hosted that year was entirely inside and he got hot pretty quickly. If you're in a cooler clime than we are, this would probably work if you're going trick-or-treating or partying outside and don't want to wear a coat. Otherwise, I would suggest a lighter fabric - while it won't look as good, it won't matter how nice the costume is if it's too hot to wear. Flannel would probably work, but still might be too hot for some. |
I will be posting more past Halloween costumes this season, with the big reveal of this year's coming on Halloween itself. Stick around for the pumpkiny goodness!
Thursday, August 23, 2012
My JoAnn's Haul
 |
| Featuring Lydia's whiskers |
Now, I know that if I had waited a week or two, the price on all this would have been reduced 25%, but I COULD NOT WAIT. No, don't point out that I already have orange stripy socks (and several pairs of tights too), or that I wall clings are a pain in the ass. I DO NOT CARE. I must appease my Halloween needs.
Oops, I didn't buy notions for my costume today. I guess I'll have to return in a few days or weeks. :)
Sunday, August 19, 2012
My Michaels Haul II
As August and summer draw to a close, Halloween fast approaches. Stores are slowly, ever so slowly, displaying their Halloween merchandise. I previously mentioned my endeavors this year in locating spooky merchandise, so I guess this is the second in the series. Perhaps there will be more? They better not all be Michaels entries!
Onto this shopping experience, which is actually two. The first took place on Friday. I was invited to a birthday party. There was a gap between the end of my work day and the party, so I killed some time at JoAnn's (gotta buy fabric for my Halloween costume, of course!). It wasn't my local one, and was quite a bit smaller, so I didn't really know what to expect. Harvest/Thanksgiving decorations were displayed front and center, just as my local one the last time I was there. As I walked past the first aisle, the next was nearly empty. There were a few items at the end of the aisle, so a glimmer of hope blossomed in my dark little heart. I went over to inspect - a few Halloween decorations (nothing to my taste), and loads of candy! I grabbed some gum drops (I had been craving them all day, so I took it as a sign of fate), but nothing else. That they had anything out pleased me greatly. Sadly, their fabric selection was small and I only got one of three fabrics I need for my costume. I guess I will need to hit up my local one after all. I'll just give them a few days to put out their decorations. :)
The rest of my stops took place today. The hubby casually mentioned that a Spirit store was opening by Michaels. I figured it wouldn't hurt to stop in. I almost never buy anything in these places. It's usually of extremely poor quality, but I occasionally will buy decorative items or be inspired by their displays. Mostly, they just convince me than ever that I'm better off making my own costumes. Anyway, this one doesn't open until September, so I will save my judgment until then. However, I did notice on the way there that my local Hancock is closing. I guess the poor service I've always gotten there (except last the last time) finally did them in.
| So now, onto Michaels. Once again, they had so many fabulous items. I have a Halloween tree (a gift from one of my sisters-in-law) that I have never hung any decorations from. There were quite a few ornaments available. While I didn't buy any, I think they'd be fantastic. I'm waiting until later in the season so I can see what's for sale elsewhere. The first picture contains two cat collars and a skulls and bones bracelet. Yes, I am one of those horrible people who dresses their cats in costumes (incidentally, you'll see glimpses of them in the pictures - I guess they also have the Halloween bug). Last year, Theora was a catfish. I'll try to post a picture of it as we get closer to the season. The bracelet is going into my jewelry box, because yes, I am one of those people who wears cheap Halloween jewelry on non-Halloween days. The next picture features two hanging ghosts. There's nothing too special about them, but they were cheap and I thought they'd look nice hanging from the chandelier. Picture #3 is a set of haunted portraits (the kind that change from a normal picture to a skeleton, demon, etc). Obviously, hard to photograph, but I had to give it a shot. You kind kind of see the effect in the picture. Lydia is sneaking in a peek. The last two items are a hearse and what looks like a recipe box. I call it a recipe box because that's the sort of box (with the rounded lid) my parents and my mother's parents kept their recipes in. (My dad's mother seemed to keep all of hers in her head. She's still going strong at the age of 85.) I don't know if that's the actual term for it or not, but that's what I'm calling it. I planned on using this to store my trivia questions, as every party I host has a trivia contest. Theora is hanging out behind the hearse because she knows how awesome it is. Look, it even has a skeleton chauffeur! Even my husband likes it, and that's saying something. I immediately took this out of its box and put it on display. This puppy is going to be a year-round decoration. |

    |
Wednesday, August 8, 2012
Hold Your Hearses
I must apologize for being AWOL most of the summer. I've been posting, of course, but those have been mostly It Came from My Closet! posts (as is this one). My only excuse is that my allergies this year have hit me the hardest of my entire adult life. I don't know if it's the heat, or the drought, or something else altogether, but this summer has been an absolute misery. I can deal with the sniffling, coughing, and sneezing, but I can't cope with the itching and extreme exhaustion. Normally, I just pop a Claritin and call it a day; this year, one isn't even close to strong enough. I've been taking two, but since it's a steroid, it severely interferes with my sleep, which only adds to my exhaustion. And ragweed season is still to come.
    | Well, onto the post. The quality of these pictures isn't so great; the batteries in my camera were dead, so I used my cell phone instead. Also, light was poor and I was in a rush. On top of that, I am a poor photographer to begin with, but you already knew that. I mentioned this fabric back in His & Hearse - it's Eerie Alley by Robert Kaufman. Pink isn't my favorite color, but when it comes to hearses, any color is acceptable. The lining and underlayer comes from leftovers of the - you guessed it - Daisy-Head Mayzie costume. I think everything I've made using the leftovers has been mentioned by now, so hopefully you won't have to hear about it again. (Unless, of course, I post the actual costume.) I can't remember if I bought this specifically to make Simplicity 3956 or not. The pattern does not list cotton as a suggested fabric, but it does suggest handkerchief linen, so I figured that was close enough. In retrospect, cotton is a little heavy considering that it is lined and layered. If you want to make this in cotton, probably one layer would be sufficient. On the printing of the pattern I have, nowhere on the outside of the envelope does it say the fabric is to be cut on the bias. Once I made the decision to actually go through with this, and I had already deviated by using the "wrong" fabric, I wasn't going to let a little thing like a bias-cut layout stop me. It might be prudent to go up a size, as I did, if you use this method. (For those who don't know, fabric cut on the bias is stretchy, so the extra ease of going up a size makes up for losing that.) This pattern isn't super difficult, but it does have some tricky bits. The lining was finicky - more than linings usually are. Due to the gathering and matching up the tailor's tacks, not to mention the ravelly nature of cotton, it was a bit frustrating. I prevailed in the end, obviously, but I would suggest that only those already experienced with sewing linings and gathering tackle this one. Probably good for an advanced beginner or an intermediate. You think I would have learned my lesson after the trouble I went through with the other hearse fabric - namely, blouses like this are obscenely low-cut on me and gap in the front. I hand-sewed in the privacy panel in the front. Because it isn't sandwiched between the outer fabric and the lining, it doesn't look as nice as I would like. It isn't worth taking the whole blouse apart to properly sew in the panel, but if I did this again, I would certainly take do so. In other news, though I haven't had the energy to trek up to the sewing room, I did mange to work up enough to do something I have wanted to do for a while: I got my nose pierced over the weekend. I would take a picture, but at the moment, my camera's batteries are still dead, and my phone's battery is nearly so. Thanks for your patience over the summer. I am hoping things will improve once the worst of the season has passed. |
Sunday, July 29, 2012
My Michaels Haul
Some of the blogs I follow (The Halloween Tree, Old Fashion Halloween, and Vintage Halloween Collector) eagerly alerted me to the fact that Michaels has begun to put out their Halloween decorations. (For those of you that don't know, Michaels is an arts & crafts store in the US & Canada.) I had errands to run today anyway, so I figured a quick stopover couldn't hurt.
My first stop was the JoAnn's that's practically across the street from my house. While they keep out their leftover Halloween fabric year-round, they only recently got their new shipment of fabric for the season. There are some fun new fabrics, such as this purple one, but I particularly love this poison fabric. It would make a fun tablecloth for a Halloween party, but knowing me, it will likely end up as a dress. Sadly, my store doesn't have that in stock.
I had stopped in a few weeks ago and noticed they already had out their Thanksgiving decor out, but no Halloween. I was certain that it would be out by now, but they still had nothing. I asked a clerk and he said he didn't now. He asked a manager and was answered with a shrug and a vague "soon."
Though I went to Michaels next, I will save that trip for last. Third on the list was Hancock Fabrics. I have only been to the one nearby my house, and I must say that I am not impressed by it. It's mostly the poor service that gets to me, so I usually only drop in when JoAnn's is closed, JoAnn's doesn't have what I need (and I need it immediately), or to peruse their Halloween items. They also had out their Halloween fabrics. Some were nice, but not nice enough that I wanted to buy them at full price, so I skipped on them. They did have out some minimal Halloween decorations, which is a good sign. Service was much improved this time around, so I might stop in later in the season when prices are cheaper.
My final stop was Target. When I finally found a clerk (after almost approaching two customers because they were wearing bright red shirts with khakis - oops!), I was given an apathetic "Uh... Maybe mid-September?", which seems to be pushing it a little close.
These books are so cute! Last year I decorated the organ in my living room with actual novels (Dracula, the works of Poe, etc). While I knew they were there (as I was the one who arranged them just so), I don't think they stood out enough for my guests to realize their appropriately spooky nature. These are festively distressed and easy to read, so I think they will be perfect for the organ. And, if not, I will arrange them on the coffee table.
I plan on using those flasks in the kitchen, nestled among the Halloween foods. I was a little (pleasantly) surprised at Michaels' variety of poison/witchy flasks. I will likely purchase more in the coming time. As for the tombstones, I do not have a particular plan in mind for them. I might just take them to work to decorate my desk. But regardless, they will be used.
I cannot express how excited I am for the coming season. I have already started to plan the menu for my Halloween party and arrange games. (Along with a fun little contest for the blog, if things pan out.) Of course, I still don't have a costume picked. Drat.
My first stop was the JoAnn's that's practically across the street from my house. While they keep out their leftover Halloween fabric year-round, they only recently got their new shipment of fabric for the season. There are some fun new fabrics, such as this purple one, but I particularly love this poison fabric. It would make a fun tablecloth for a Halloween party, but knowing me, it will likely end up as a dress. Sadly, my store doesn't have that in stock.
I had stopped in a few weeks ago and noticed they already had out their Thanksgiving decor out, but no Halloween. I was certain that it would be out by now, but they still had nothing. I asked a clerk and he said he didn't now. He asked a manager and was answered with a shrug and a vague "soon."
Though I went to Michaels next, I will save that trip for last. Third on the list was Hancock Fabrics. I have only been to the one nearby my house, and I must say that I am not impressed by it. It's mostly the poor service that gets to me, so I usually only drop in when JoAnn's is closed, JoAnn's doesn't have what I need (and I need it immediately), or to peruse their Halloween items. They also had out their Halloween fabrics. Some were nice, but not nice enough that I wanted to buy them at full price, so I skipped on them. They did have out some minimal Halloween decorations, which is a good sign. Service was much improved this time around, so I might stop in later in the season when prices are cheaper.
My final stop was Target. When I finally found a clerk (after almost approaching two customers because they were wearing bright red shirts with khakis - oops!), I was given an apathetic "Uh... Maybe mid-September?", which seems to be pushing it a little close.

 |
Back to Michaels. As I approached the store, I saw a bin of crafting pumpkins outside the store entrance, which I (correctly) interpreted to be a good sign. I opened the door and was immediately welcomed into a store festooned in black and orange, with beautiful accents of green and purple. I do not exaggerated when I say that I felt like I had come home. I wish I had thought to take pictures at the time; a full single aisle full of decorations, plus numerous endcaps and several bins had so much variety of spooky goodness! I had a hard time limiting myself to these items, but make no mistake; there will be many trips in the coming weeks. |
These books are so cute! Last year I decorated the organ in my living room with actual novels (Dracula, the works of Poe, etc). While I knew they were there (as I was the one who arranged them just so), I don't think they stood out enough for my guests to realize their appropriately spooky nature. These are festively distressed and easy to read, so I think they will be perfect for the organ. And, if not, I will arrange them on the coffee table.
I plan on using those flasks in the kitchen, nestled among the Halloween foods. I was a little (pleasantly) surprised at Michaels' variety of poison/witchy flasks. I will likely purchase more in the coming time. As for the tombstones, I do not have a particular plan in mind for them. I might just take them to work to decorate my desk. But regardless, they will be used.
I cannot express how excited I am for the coming season. I have already started to plan the menu for my Halloween party and arrange games. (Along with a fun little contest for the blog, if things pan out.) Of course, I still don't have a costume picked. Drat.
Monday, July 23, 2012
Halloween Is in the Air!
 This isn't sewing-related, but I thought readers might appreciate a change from the baby stuff (which is over until the next relative or friend is expecting).
I was picking tomatoes in the garden this afternoon when I noticed this little gal nestled among my tomato cages. I have only successfully grown a pumpkin once, but I keep planting, year after year, hoping this will be the time that I am triumphant.
I will definitely have to do something about the slugs though. Beer traps or something of the sort. They are usually what kills my baby pumpkins. :(
Saturday, June 30, 2012
The Countdown Begins!
Today marks four months until Halloween! Decorations should start appearing in stores, new fabrics will be released, and delicious candy treats will beg to be eaten. I start prepping for the holiday now because it always involves a ton of sewing for me. I only had three costumes to do last year, but some years it can be as high as six. I'm probably going to have my party earlier in October this year, so I need my costume (which tends to get more elaborate every year) done sooner. I'm not sure what I'm going to be yet, but I need to make the decision soon. Some ideas include:
Any suggestions from my dear readers?
- Evil Lyn from He-Man: a little risque for work, I think
- Lizzie Borden: pretty easy, perhaps a little boring, and likely too obscure
- Isis or Nefertiti: fun, but a bit too much like what I was last year
- The Headless Horse(wo)man: I could probably steal a few pieces from my privateer costume for this
- A valkyrie
- Morrigan
- Mina Harker
Any suggestions from my dear readers?
Saturday, June 23, 2012
His & Hearse

  |
This is another It Came from My Closet! post, as I am attending a wedding this weekend and working on a project for someone else. It is no surprise that I, like most spooky types, dig hearses. I love them, quite frankly, and they hold a special place in my dark little heart. Ya see, when I met the now Mr Not Pixie, he drove a purple hearse. (I wish I could say it was love at first sight, but it wasn't. Not even close. But he grew on me.) Ever since I started sewing, I have been on the look out for hearse fabric. I had even pondered doing something like Spoonflower, but always shied away at the cost. Then two summers ago, Robert Kaufman released Eerie Alley. Not just purple hearses, but lime green and orange ones too! On white and black! (And another with pink hearses on black, which I, of course, made into a different blouse.) "It must be mine! Immediately!" It was a designer release, and a new one at that, so this didn't come cheap, but I didn't care. For purple hearses, I would pay, and pay gladly! And so I did. (Even a designer fabric is cheaper than Spoonflower.) New Look 6515 is so long out of print that it doesn't even appear on the Simplicity web site. (This link will take you Pattern Review's, um, pattern reviews for the, um, pattern.) I made view B, though my finished blouse doesn't really resemble theirs. It's a testament to how much I love this fabric that I was willing t put in so much work to get a wearable garment. First up: blouses like these, that lap one side over the other, rarely (in my experience) instruct you to stitch the bust pieces to each other somehow. I suppose that would work out just fine if you're the busty variety, but I most certainly am not; consequently, these always gap in the front. Though I am flat-chested, I am also broad-backed, which tends to even out, usually, in terms of ease. However, the amount of ease in both the front and back was ridiculous. I kept pulling the bust pieces closer and closer together, and omitting more and more gathering (so the cup itself would be smaller), but it finally got to the point where I had no gathering left and the pieces were lapped straight over one another. It fixed the gapping, but because there was no gathering, it ceased to be an empire-waist blouse. So I grabbed a piece of elastic and hand sewed it into the white band that you see at the front. Even after all of that, the ease was still so extreme that I look off a few inches of the back of the blouse too. Originally, this actually called for a zipper, but even now, I can still pull it on over my head with no problems. I can't imagine why you'd need a zipper with as much ease as the pattern originally called for. So, in conclusion, this pattern didn't really work for my body type. It might work for someone who has a full bust (but not too full, or you'll spill over the top). It wasn't difficult to sew, but it did require a lot of adjustments to get it me-sized. I did see a lot of other people complaining about the same problems I did, so maybe it wasn't just me Sorry, once again, for my wet hair. Please admire my floormat in the background. I usually move it out of the way for pictures, but forgot to this time. It decorates my foyer year-round (I have another at the back door as well). They were gifts from my sister-in-law, who seems to live out her spooky dreams vicariously through me. |
Lydia update: the day I write this marks four weeks of having this little grey terror live with us. She's put on 18 ounces (~.5 kg) in that time. The vet said she's doing well, though said with her feral start to life, she will probably have some delayed growth.
Outfit:
Skirt: Wet Seal, free at a clothing swap
Shoes: Famous Footwear, $70 (featured on Green with Envy)
Socks: from the same pack of vibrant colors featured on Green with Envy
Earrings: Hearses and coffins were charms I bought on Etsy and attached to fishhooks; skull earrings from eBay (featured on Skull Skirt)
I have a coffin necklace (made from the same charms as the earrings) that I usually wear with this, but couldn't find it this morning. I was so distraught that I forgot my awesome purple hearse barrettes too. :( Not all bad though - at work, a guy in a suit that I'd never seen before, told me he liked how my purple socks, hair, and hearses coordinated together. :)
Sunday, June 17, 2012
Green with Envy
Due to Red & Black week and being out of town this weekend, I don't have any new sewing to show you. Instead, I raided my closet to show you this dress that I made just before I started the blog.

If the bolero looks familiar to you, I direct you to my second pattern review, featuring Simplicity 2183. I am getting more use of out of this more than I thought I would, because the bolero is frequently waiting to be washed when I want to wear it. This means, of course, that I must make another and/or more in a different pattern.
Finally, onto the pattern review. The dress isn't as simple to make as it looks. There's gathering under the bust, which I expected, but it also has pleats in the front and back (which are covered by the sash). It is also lined. It isn't difficult at all, just it's more complicated than it seems. The sash, however, is ridiculously simple. I would recommend this for an advanced beginner.
Modifications made: I shortened the straps (as always) and lengthened the skirt (as always). I made the sash in the largest size in the envelope because I like having lots of dangly ends.
One final word of caution here: take care when choosing a fabric for this dress because some of it is cut on the bias.
Accessories:
Barrettes: Etsy, ~$2
Earrings: Etsy, ~$5
Socks: Target, $7 for a package of six vibrant colors
Shoes: Famous Footwear, $70 (more expensive than what I usually go for, but so comfy and so worth it)
Yeah, my hair is wet again. Sorry.


|
I've mentioned previously that I am frequently get on kicks for a particular style (usually vintage-inspired) or color combination. In this case, it was both. New Look 6776 wanted desperately to be sewed, but I hadn't yet found a fabric that tickled my fancy. I woke up one morning wanting to wear green, which isn't too prominent in my wardrobe (despite being my favorite color). To remedy this, I went on a fabric search. Unfortunately, black and green isn't too common a color combination. Although I love this fabric (Boo to You! by Riley Blake, which also comes in purple and grey), I wasn't too happy about making another vintage-inspired dress in polka dots, because I had just made one the previous summer (in orange, which I will feature at some later date). Obviously, my reluctance was overcome in the end. The fabric for the sash is nothing special. It's just a quilting cotton from JoAnn's. They did have an exact match for the dots, but it was just too stark against the dress. I thought this one, with its own dots, looked better. |


|

If the bolero looks familiar to you, I direct you to my second pattern review, featuring Simplicity 2183. I am getting more use of out of this more than I thought I would, because the bolero is frequently waiting to be washed when I want to wear it. This means, of course, that I must make another and/or more in a different pattern.
Finally, onto the pattern review. The dress isn't as simple to make as it looks. There's gathering under the bust, which I expected, but it also has pleats in the front and back (which are covered by the sash). It is also lined. It isn't difficult at all, just it's more complicated than it seems. The sash, however, is ridiculously simple. I would recommend this for an advanced beginner.
Modifications made: I shortened the straps (as always) and lengthened the skirt (as always). I made the sash in the largest size in the envelope because I like having lots of dangly ends.
One final word of caution here: take care when choosing a fabric for this dress because some of it is cut on the bias.
Accessories:
Barrettes: Etsy, ~$2
Earrings: Etsy, ~$5
Socks: Target, $7 for a package of six vibrant colors
Shoes: Famous Footwear, $70 (more expensive than what I usually go for, but so comfy and so worth it)
Yeah, my hair is wet again. Sorry.
Wednesday, June 6, 2012
A Harley Quinn Romance
Today's Red and Black entry is another blast from the past. This one comes from Halloween 2006. My husband and I, for the first any only time, opted for a couple's costume for Halloween: The Joker and Harley Quinn.
 I didn't use a pattern here because spandex is pretty forgiving (in terms of getting a fit, at least). I wrapped the fabric around myself, safety pinned it in place, and then cut it accordingly. The diamonds were a little difficult to sew on because the fabric needed to be stretched for that, which basically meant that I had to be wearing it. It was easy enough to put them on the left side (using my right hand), but not so much on the right. I am ridiculously right handed.
The gloves were easy: I traced my hand, cut it out, and sewed it together.
The headpiece was a little difficult. It's a separate piece from the costume, and I had a terrible time getting it to lay flat. In the end, I think I made three of them before one worked. The points on the headpiece (dunno what else to call them; does anyone know the technical term?) are just curved pieces of spandex and stuffed with polyfill. If I did this again, I would line them, because little pieces of the stuffing kept creeping out through the fabric. I attached two jingle bells at the end of the points and added elastic around the face opening for a tight fit.
 Hubby's costume was created out of thrift store finds. For the jacket, I cropped it to the waist, flipped the pieces around, and sewed them on as tails. The fabric went against the grain for that, but for a thrift store costume, it wasn't too bad. The flower was just some yellow satin I had in the stash. I cut out a few flower shapes, layered them in a staggered fashion, and sewed them together. The vest is just a satin blouse. I cut off the sleeves and altered the neckline. From those pieces I cut, I made the tie and pocket square. His shirt and pants, thankfully, I didn't need to alter.
His costume is great because it shows how you can make a fabulous costume without spending a lot of money or time, or having a lot of talent.
We won first prize at the Halloween party we went to!


The gloves were easy: I traced my hand, cut it out, and sewed it together.
The headpiece was a little difficult. It's a separate piece from the costume, and I had a terrible time getting it to lay flat. In the end, I think I made three of them before one worked. The points on the headpiece (dunno what else to call them; does anyone know the technical term?) are just curved pieces of spandex and stuffed with polyfill. If I did this again, I would line them, because little pieces of the stuffing kept creeping out through the fabric. I attached two jingle bells at the end of the points and added elastic around the face opening for a tight fit.

His costume is great because it shows how you can make a fabulous costume without spending a lot of money or time, or having a lot of talent.
We won first prize at the Halloween party we went to!
Monday, June 4, 2012
A Pirate's Life for Me!
This post is going to be a blast from the past. I was a privateer for Halloween 2009 (for those of you that don't know, a privateer is basically a government-sanctioned pirate). This costume was a bit of a rush job because I had to sew six costumes over the course of two months. I apologize for the poor resolution of these images - I can't seem to locate the original high-res pictures.

First up here is the blouse. It's Simplicity 4914, and if you want it, I suggest you buy it as soon as possible. It's been out of print for several years and I imagine that supplies are quite limited. I actually didn't make the blouse to wear with the costume, I made it much earlier to as an everyday wear item. It's a beautiful black-on-black brocade featuring phoenixes (phoenices?) and dragons. I wish I had bought more of it, because it would make a fantastic vest or dress.
The blouse appears as though it would lace up the front, but it actually has a zipper in the back. Unfortunately (though you can't really tell in this picture, but you can in the pattern link), the blouse starts to end at the actual waist. I usually have to wear something under this, which is unfortunate, because the brocade is both quite heavy and lined. The sleeves are also ridiculously short, so I lengthened them, but that only adds to the weight of the garment. For those reasons, I don't get to wear this as often as I would like to. Don't get me wrong, I love the blouse and get a ton of compliments on it, but it isn't as convenient to wear as I would have wanted.
Anyway, onto the pattern review. The construction of the blouse itself wasn't too bad. Some pretty precise marking is necessary here for the sleeve's grommet tape, and the front was a little finicky, but this could be tackled by an intermediate, I think.
 I think the only pattern I hated more than this coat pattern (Simplicity 3677) was the tuxedo I made for my sister's wedding, and the only reason I hated that more was because a good chunk of the instructions weren't translated from German to English. This pattern wasn't really difficult, but it was quite lengthy. Nothing wrong with a lengthy pattern, as long as it produces a nice garment in the end, but this most certainly did not. I know that I frequently bemoan Simplicity for calling for more fabric than the garment actually needs, but this had nearly two yards left over.
That was the least of this pattern's sins; if you look at the pattern picture, it doesn't have the best shot of the front. I made this coat two sizes larger than what I normally wear because the blouse was so bulky. Even two sizes too large, this coat would not close over the blouse. I tried it over something with a slimmer silhouette, and it still didn't close. It isn't actually meant to close - despite calling for twenty-eight buttons (which I had to special order), this coat contains no buttonholes.
And again, the sleeves here are just too short. Do people think that pirates loved walking around with exposed wrists?
The facing here looked stupid and the instructions for the godets were crap. There is nothing redeeming to this pattern and I would recommend it under no circumstances.
 The breeches/bloomers are from the first pattern. They're made out of
crepe-backed satin. They were so easy that I think I completed them in
about an hour. Basically, it was just cutting out the two pieces;
sewing them together; folding down the waistband and inserting the
elastic; and sewing on the bias tape into the legs and inserting the elastic.
Very simple. They probably are not historically accurate for any era,
but these would make a great start to a beginning sewer's steampunk
costume.
The breeches/bloomers are from the first pattern. They're made out of
crepe-backed satin. They were so easy that I think I completed them in
about an hour. Basically, it was just cutting out the two pieces;
sewing them together; folding down the waistband and inserting the
elastic; and sewing on the bias tape into the legs and inserting the elastic.
Very simple. They probably are not historically accurate for any era,
but these would make a great start to a beginning sewer's steampunk
costume.
 There are two things I made here that I didn't have a pattern for: the wrap and the bandanna. Both were super easy: the bandanna was just a square of satin (made from the excess from the failed coat) and the wrap is just a triangle of costume satin from Joann's.
A breakdown of my accessories:
Rose choker: $7, Hot Topic
Striped knee socks: $5 - $10, Hot Topic
Shoes: $20, Journey's
Hoop earrings: Claire's

First up here is the blouse. It's Simplicity 4914, and if you want it, I suggest you buy it as soon as possible. It's been out of print for several years and I imagine that supplies are quite limited. I actually didn't make the blouse to wear with the costume, I made it much earlier to as an everyday wear item. It's a beautiful black-on-black brocade featuring phoenixes (phoenices?) and dragons. I wish I had bought more of it, because it would make a fantastic vest or dress.
The blouse appears as though it would lace up the front, but it actually has a zipper in the back. Unfortunately (though you can't really tell in this picture, but you can in the pattern link), the blouse starts to end at the actual waist. I usually have to wear something under this, which is unfortunate, because the brocade is both quite heavy and lined. The sleeves are also ridiculously short, so I lengthened them, but that only adds to the weight of the garment. For those reasons, I don't get to wear this as often as I would like to. Don't get me wrong, I love the blouse and get a ton of compliments on it, but it isn't as convenient to wear as I would have wanted.
Anyway, onto the pattern review. The construction of the blouse itself wasn't too bad. Some pretty precise marking is necessary here for the sleeve's grommet tape, and the front was a little finicky, but this could be tackled by an intermediate, I think.

That was the least of this pattern's sins; if you look at the pattern picture, it doesn't have the best shot of the front. I made this coat two sizes larger than what I normally wear because the blouse was so bulky. Even two sizes too large, this coat would not close over the blouse. I tried it over something with a slimmer silhouette, and it still didn't close. It isn't actually meant to close - despite calling for twenty-eight buttons (which I had to special order), this coat contains no buttonholes.
And again, the sleeves here are just too short. Do people think that pirates loved walking around with exposed wrists?
The facing here looked stupid and the instructions for the godets were crap. There is nothing redeeming to this pattern and I would recommend it under no circumstances.


A breakdown of my accessories:
Rose choker: $7, Hot Topic
Striped knee socks: $5 - $10, Hot Topic
Shoes: $20, Journey's
Hoop earrings: Claire's
Subscribe to:
Posts (Atom)